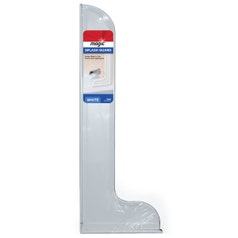
Tub & Floor Peel & Stick Caulk
Recaulking your tub and floor doesn't have to be a pain with Magic Tub & Floor Peel & Stick Caulk. It's designed to provide a flush seal without the usual mess of caulking


Magic Peel & Stick Caulk is an easy alternative to traditional caulk. It is designed to create a tight seal between the bathtub and floor to keep moisture out.
Size: 1 1/4" x 5' (3.2cm x 1.5m)
Additional Supplies Needed: Caulk removal tool, paint thinner or mineral spirits, scouring powder, scrubbing pad, rubbing (isopropyl) alcohol, paper towel or clean rags, tape measure, scissors
Directions: For proper adhesion, please follow the instructions carefully. Utilize proper protective equipment when completing this project. Review all cautionary information on each manufacturer label for guidance.
Surface Preparation: Preparing the surface is critical to successful adhesion of Magic Peel & Stick Caulk.
- Remove all existing caulk. Paint thinner or mineral spirits can be used to soften caulk prior to removal.
- Thoroughly clean the surface with scouring powder to remove all residue, and then rinse with water.
- Wipe previously caulked areas with rubbing alcohol. 4. Dry all surfaces thoroughly.
Caulk Strip Preparation:
- Measure the side of the tub where you would like to apply the caulk and cut strip of caulk to length.
- Pre-bend strip of caulk by folding it at the score line that runs down the middle to form a 90° angle.
Application:
- Without removing caulk backing, place one end of the pre-bent strip in the corner where the tub and floor meet. Take care to keep caulk from getting wet during application.
- Starting in the corner, peel a small section of the backing from the top half of the strip. Press top half of strip firmly to the tub. Work carefully to avoid having to reposition the strip once adhered.
- Working in small sections at a time, continue to slowly pull off backing and press the strip firmly to the tub until the entire top half of the strip is adhered.
- Repeat process for bottom half of strip. Press bottom half of strip firmly against floor to complete installation.
- Prevent water contact with caulk for a minimum of 12 hours after installation.
How do I use this product around corners?
You will need to cut the caulk into separate pieces and align them at the corner.
Can I use this on top of existing caulk?
No. Prepping the surface is critical to the product working correctly. Part of those prepping instructions (which you can find under the “Directions” section) includes removing all existing caulk from the area for proper adhesion.
Suministros Adicionales Necesarios: Herramienta para quitar la masilla, diluyente o solvente mineral, polvo limpiador, almohadilla aplicadora, alcohol isopropílico, toallas de papel o trapo limpio, cinta métrica, tijeras.
Instrucciones: Para una correcta adhesión, siga las instrucciones cuidadosamente. Utilice el equipo de protección adecuado para realizar esta tarea. Revise todas las precauciones suministradas por cada fabricante en las etiquetas correspondientes.
Preparación de la Superficie: La preparación de la superficie es un paso crítico para lograr la correcta adhesión de Magic Peel & Stick Caulk.
- Remueva completamente la masilla existente. Puede usar diluyente o solvente mineral para ablandar la masilla antes de removerla.
- Limpie completamente la superficie con polvo limpiador para eliminar restos de suciedad y residuos, y enjuague con agua.
- Limpie con alcohol isopropílico las áreas donde había masilla.
- Enjuague las superficies completamente.
Preparación de la Cinta Selladora:
- Mida el lado de la bañera donde desea aplicar la cinta selladora y corte una cinta con la medidas correcta.
- Doble previamente la cinta selladora longitudinalmente a mitad siguiendo la línea de la ranura de la masilla, formando un ángulo de 90°.
Aplicación:
- Sin extraer el papel protector, ubique un extremo de la cinta selladora previamente plegada en la esquina donde convergen la bañera y el piso. Evite que la masilla de la cinta se humedezca durante la aplicación.
- Comenzando desde la esquina, quite una pequeña sección del papel protector de la mitad superior de la cinta. Presione la mitad superior de la cinta firmemente contra la bañera. Trabaje cuidadosamente para evitar tener que reposicionar la cinta una vez adherida.
- Trabaje en pequeñas secciones y continúe quitando el papel protector lentamente y presionando firmemente contra la bañera hasta que toda la parte superior de la cinta selladora quede adherida.
- Repita el proceso con la parte inferior de la cinta. Presione la mitad inferior de la cinta firmemente contra el piso, para completar la instalación.
- Evite que el agua entre en contacto con la masilla durante 12 horas después a la instalación, como mínimo.
-
-
-
 Porcelain Chip FixOut of stock
 -

-